This page is intended to give a few clues as to what information is needed so that experts can help quickly. Otherwise, a question-answer game will ensue, which can take a long time before the problem is found. The following screenshots / information should be kept ready.
If you provide this information, 95% of all issues can be identified within 5 minutes.
The following pages will help with different types of problems:
Mechanical / Electrical problems: Adjustment and maintenance of the mechanics.
Problems with the software: Setting up the software
Problems with the material settings: Settings-guide
Problems with the firmware settings: Firmware update and settings
Screenshots 1: Connection to the laser
If there are problems with the connection to the laser, you should first check whether the operating system still recognizes the laser. This can be done under Windows in the device manager, under macOS and Linux in the command line. Under Windows, you should remember the number of the COM port, under the others the name under /dev/tty*. More information about installing the drivers can be found in this article: Software Setup.


The respective port must then be selected in LightBurn, LaserGRBL or other control program; otherwise no connection can be established.
Screenshots 2: Settings of LightBurn
[LaserGRBL does usually not need any general system settings]. Check the following windows and take a screenshot. The optimal settings you should select in these windows are explained in the article setting up the software (they might vary from the values shown here!).
Main settings
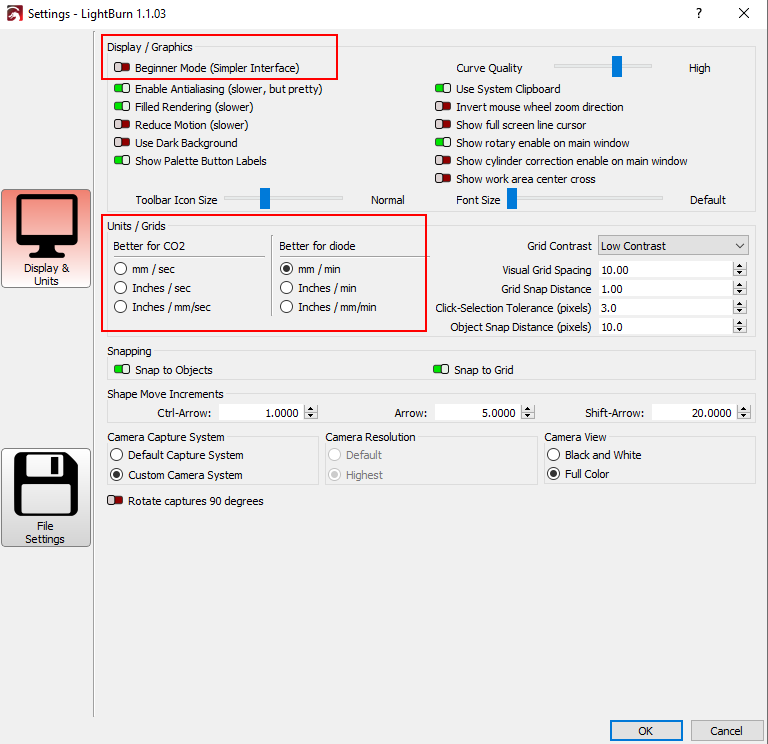
Marked settings are most important
Device settings
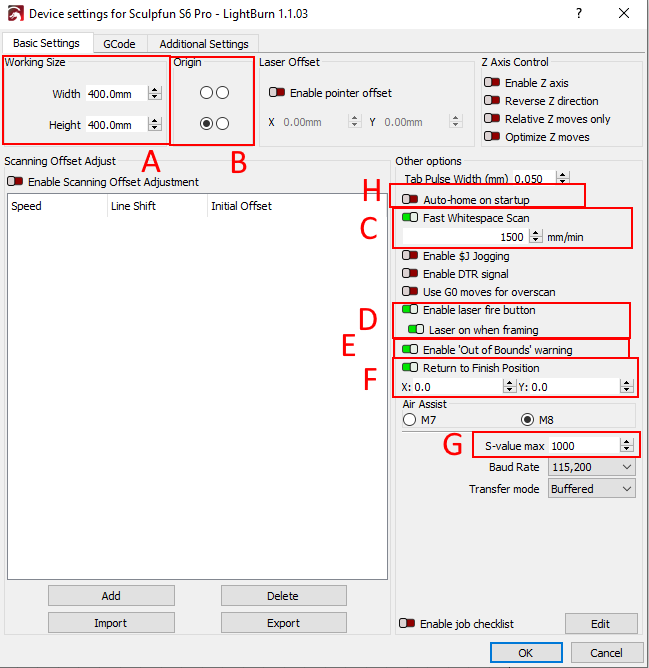
Marked settings are explained in the software setup article.
Move- and Laser-Window

Marked values are most important
Screenshots 3: Project settings
If there are problems with the laser result, the exact settings are needed. In LightBurn the windows shown above, additionally the detailed settings of the layers (double-click on the layer in the layer window). Help on settings can be found in the Guidelines on Settings.
Layer overview

Fast overview about all settings
Layer details (double-click on layer)

This shows incorrect layer settings in detail.
LaserGRBL settings

These settings can be set in LaserGRBL
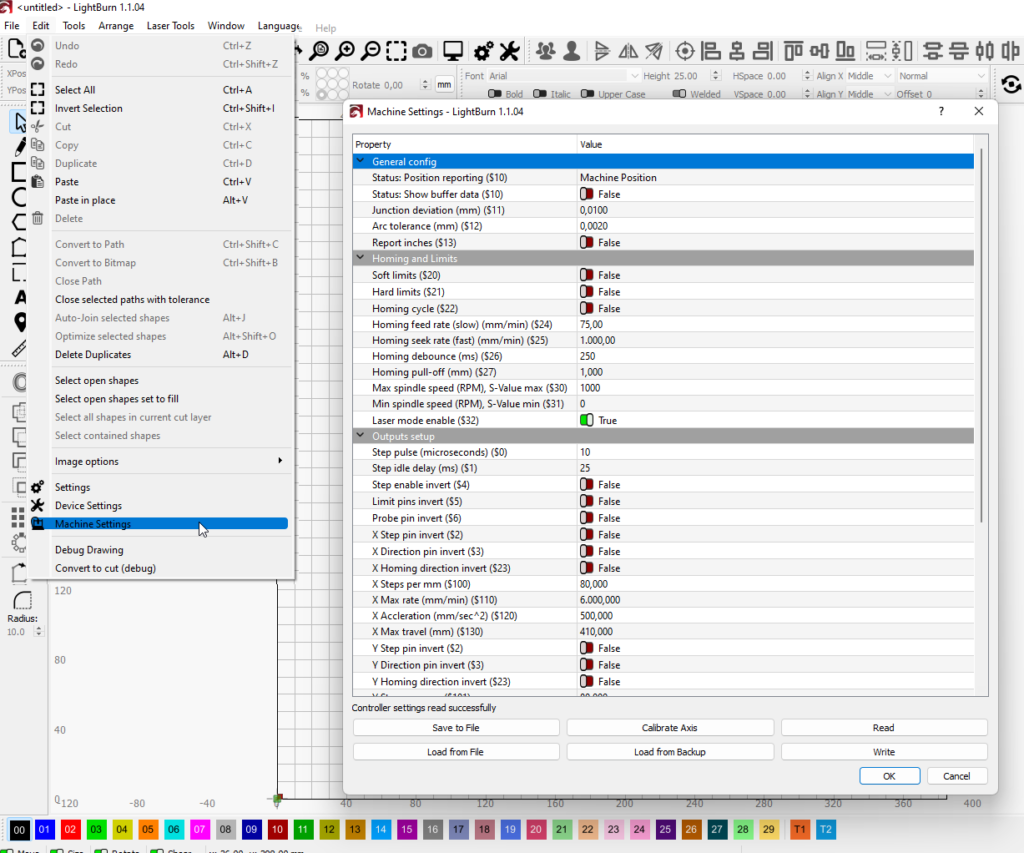
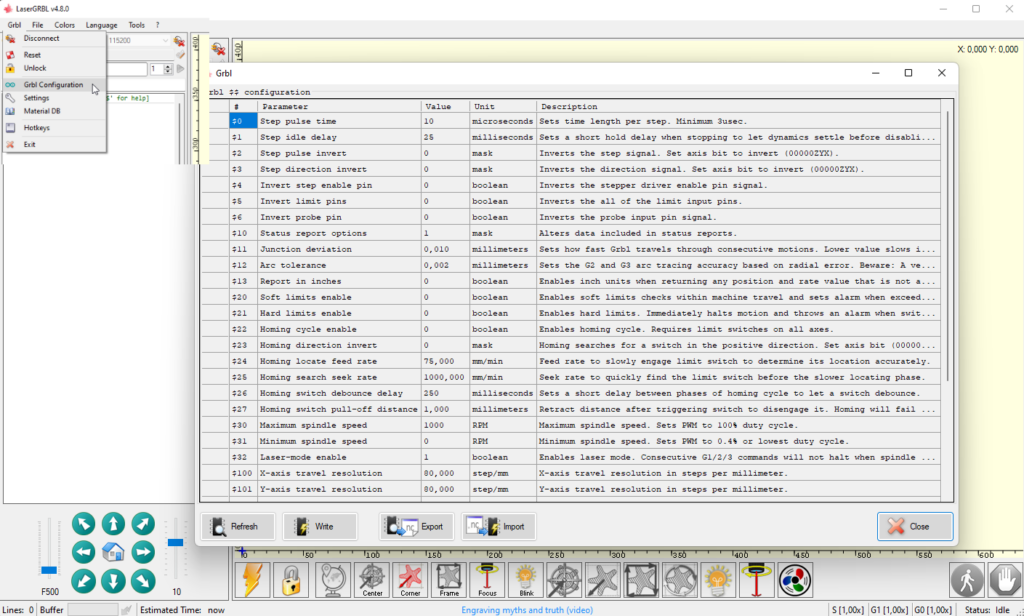
Screenshots 4: Firmware settings
Lastly, the firmware settings are important for assessing the issue. These can be accessed either via Edit → Machine Settings in LightBurn or Grbl → grbl Configuration in LaserGRBL. Here, screenshots are sometimes difficult because you can’t get all the lines on one screenshot. You can also enter the command “$$” in the console in LightBurn or LaserGRBL, then all settings are output as text, which you can copy and paste better. A lot of information and a table with all recommended values can be found in the article about firmware settings.
LightBurn Machine Settings
LaserGRBL grbl configuration
Output in the console window

Screenshots 5: Your result
In case the outcome is not as expected, you should show a picture of how it looked like, of course 🙂