Overview
On this page, I collect all information about the new Sculpfun S10 laser. The introduction has been postponed for some time, but now it is here. I have already been able and will test it and make the results available here. In particular, I would like to discuss the changes to the S9 and create corresponding instructions. The official introductory videos can be found here: YouTube. More reviews can be found at the bottom of the page. If you like video reviews, I recommend checking out the one from Dragoncut. The manual can be downloaded here.
Introduction Video
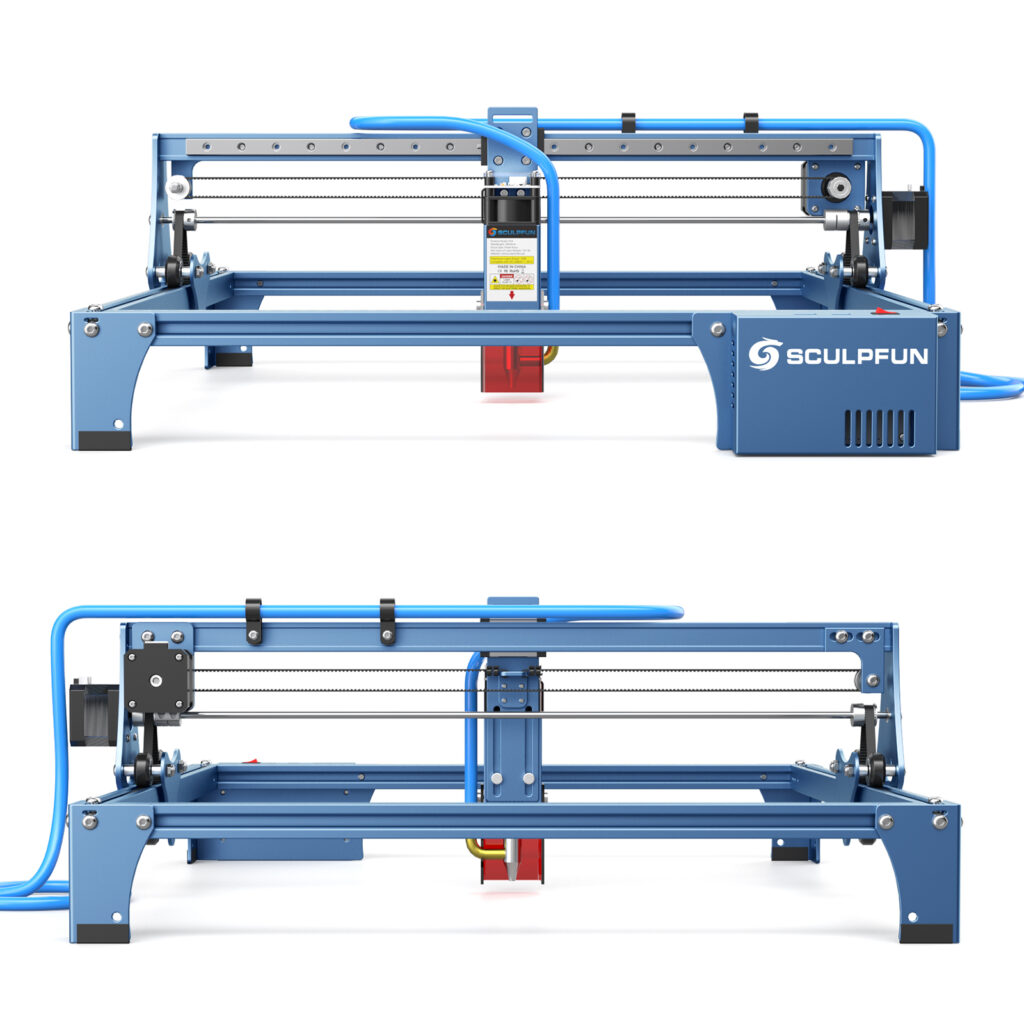
S10 Module Installation (S9 frame)
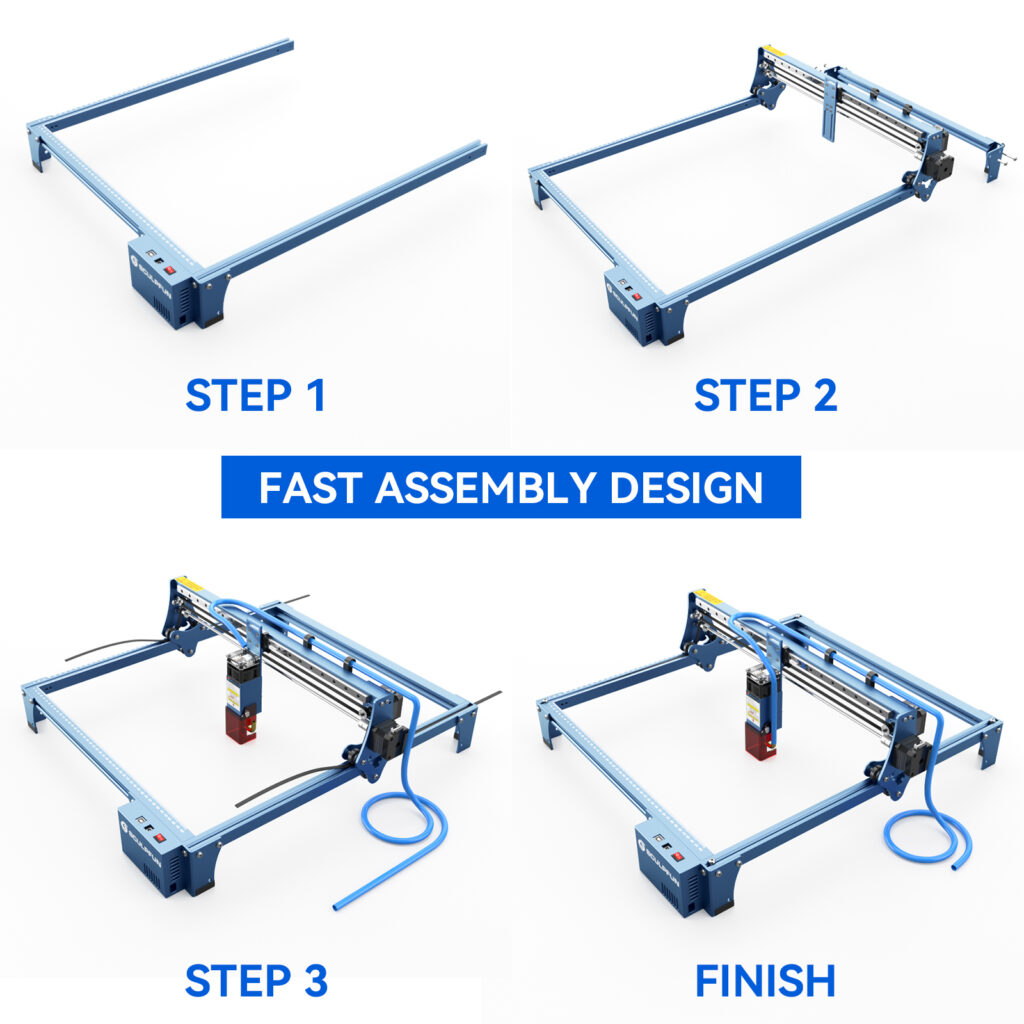
Assembly
A list of shopping links to the laser kit or the laser head can be found on the links / resources page.
Frequently asked questions
Is the air assist pump included? What technical data does it have?
The pump is not included in the scope of delivery, but is available separately (currently not yet, but soon). I tested it and is very quiet! Technical data of the pump:
- Model: AP-30A
- Voltage: 200-240V, 50Hz (no 110V!)
- Power: 16W
- Volume: 30L/min, adjustable
- Pressure: > 0.03 MPa
The only disadvantage in my opinion is the air inlet that is at the bottom of the pump. It’s difficult to attach a hose there, in case you want to include the pump into an enclosure (I have bad experiences if the pump sucks in the dirty air within the enclosure; therefore I’d like to use air from the outside).


Is the laser head sold separately?
Yes, this will be possible shortly. It can also be mounted to the frame of the S6 / S9 laser.
Edit: Seems it arrived at the usual stores (AliExpress, Banggod etc.) now. Just do a quick search there.
Can I mount the laser head to an S6 / S9 frame?
Yes, this is no problem. Both mechanically and electrically, the heads are compatible. The power supplies (12V, 5A) also provide enough power.
The head can also be operated on many frames from other manufacturers (as long as the laser head is supplied with 12V and a 12V control signal). There is a fairly universal bracket supplied, if that does not fit, you have to help yourself.
If I already own an S6/S9 – should I buy just the laser module or the whole kit? Is the upgrade worth it?
Of course, it is not possible to give a universal answer to this question. In principle, I would say:
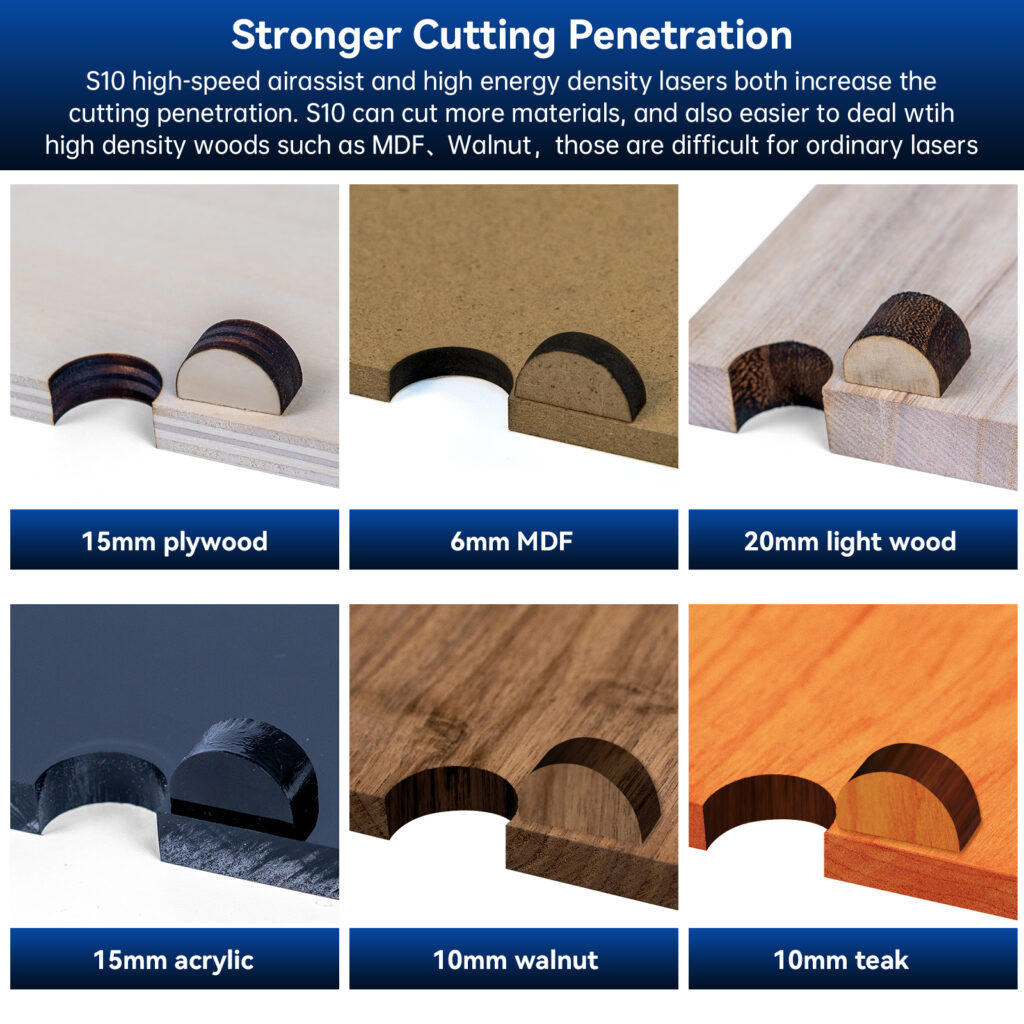
- The upgrade is worthwhile for anyone who cuts a lot. The S10 is still significantly stronger than the S9. On the one hand, this means more freedom with the materials (thickness) and faster execution for previous projects.
- Those who mainly engrave don’t necessarily need the upgrade, the focus of the S10 is not significantly smaller than the S9 (officially also the same).
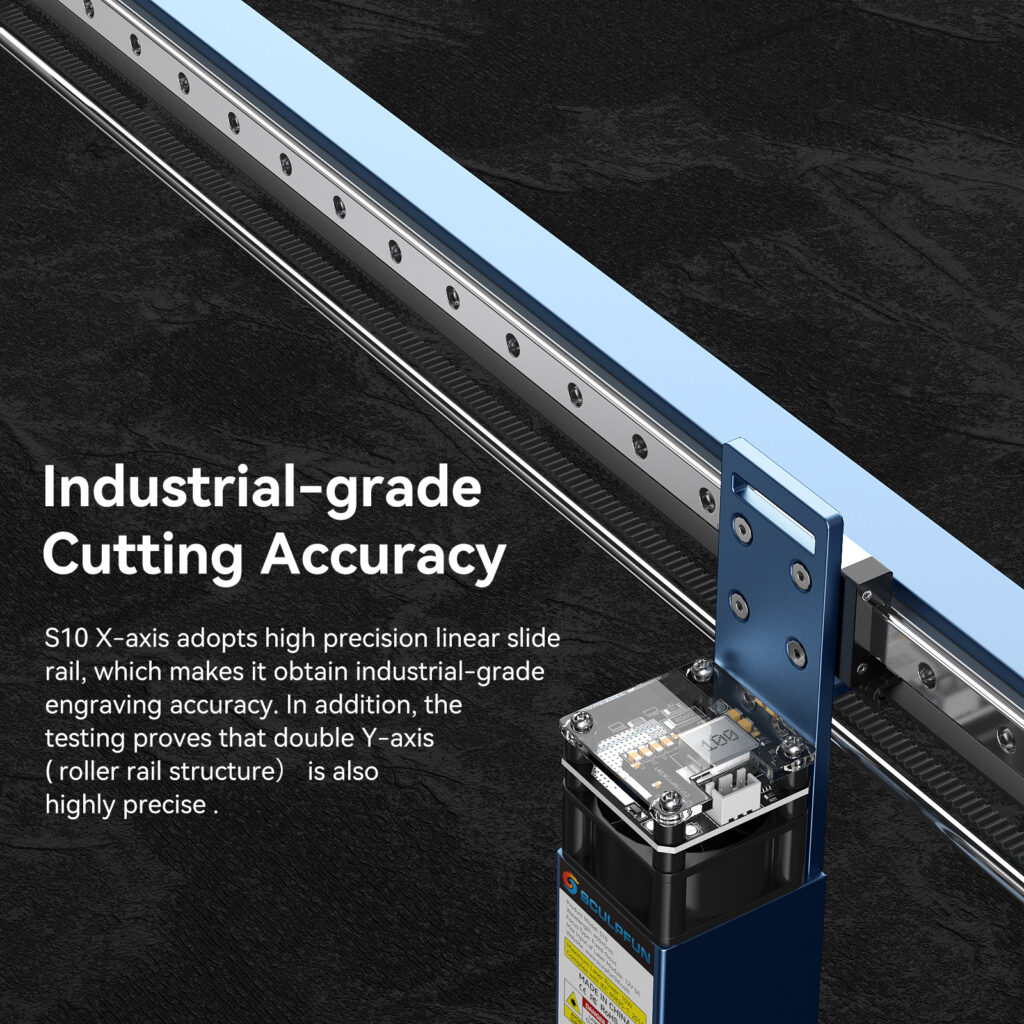
- If you want to get the last bit of accuracy and detail out of it, you should buy the full kit. The new x-axis is a significant improvement over the old x-axis. Furthermore, higher speeds are possible with the same stability (the x-motor is no longer moved on the axis and therefore the mass to be moved is much smaller). In this case, it is also worthwhile if engraving is predominant.
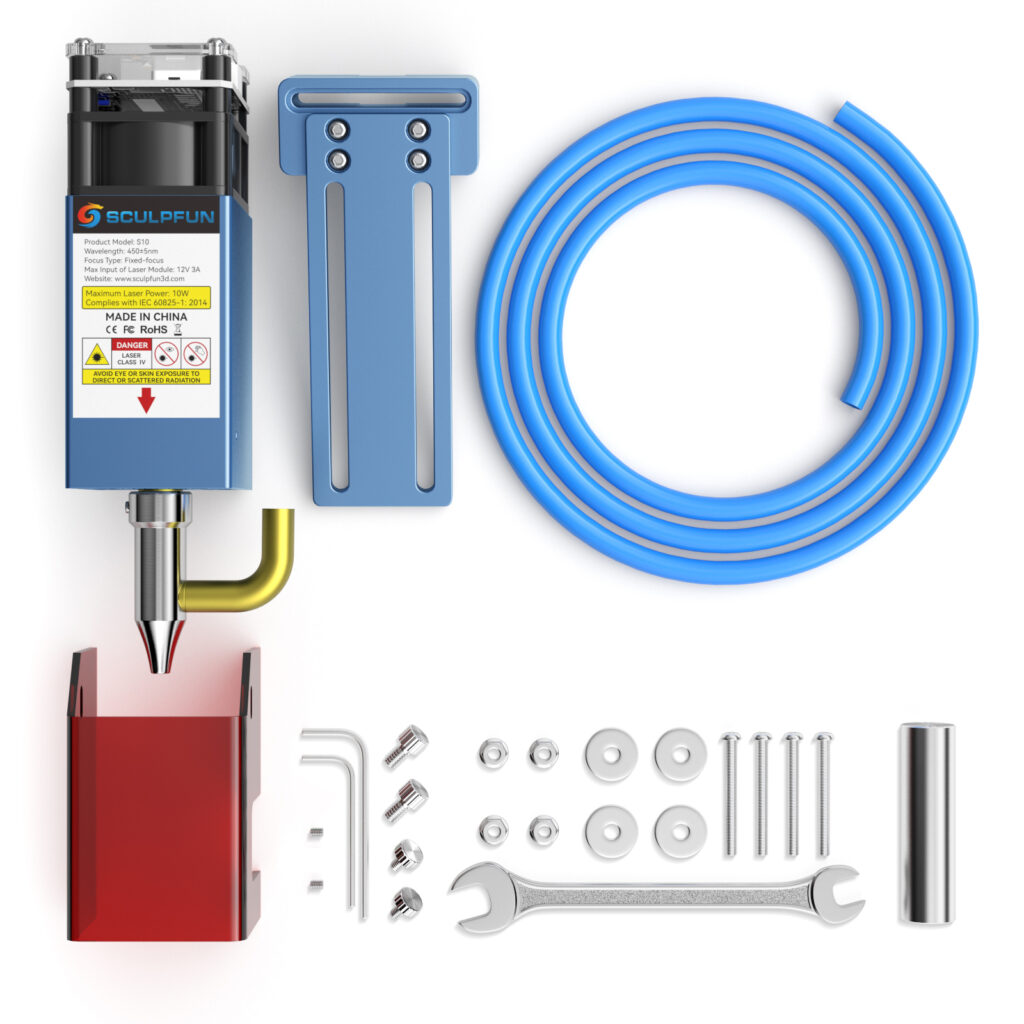
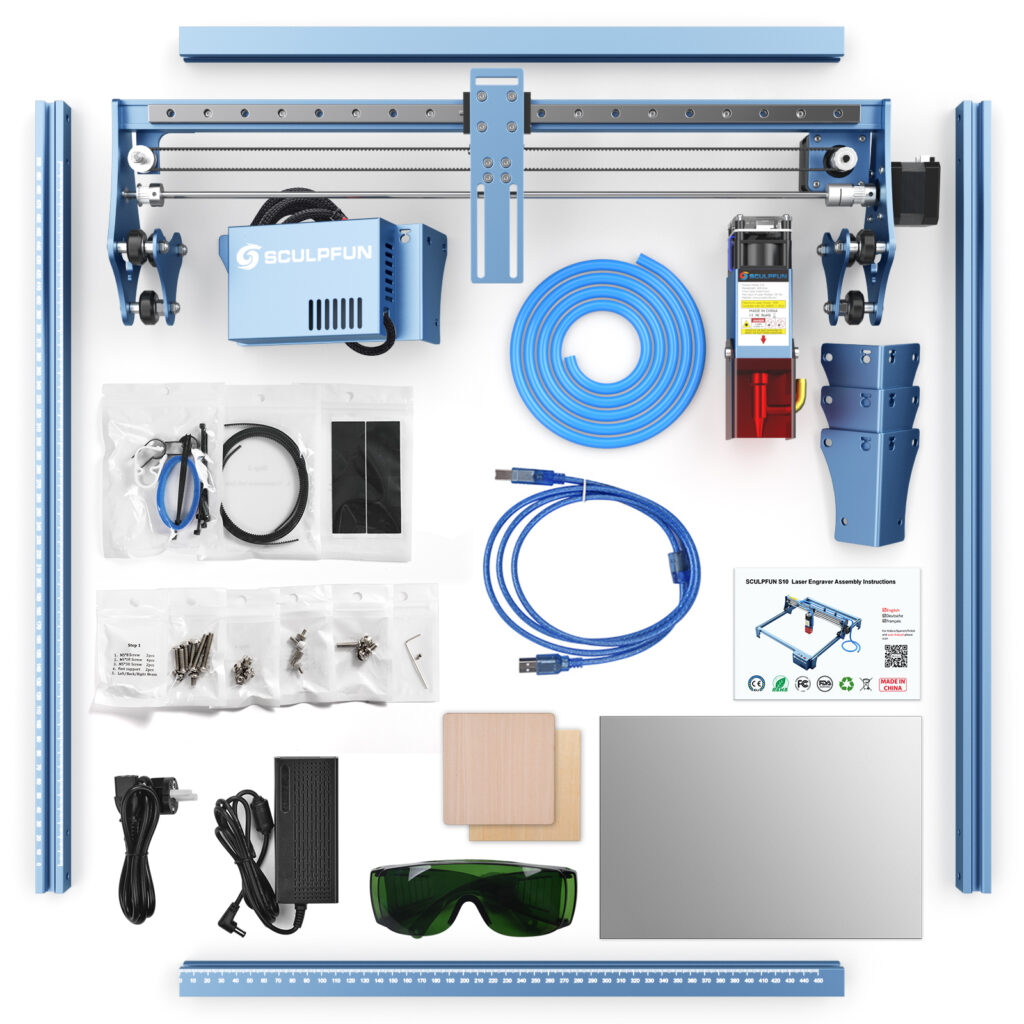
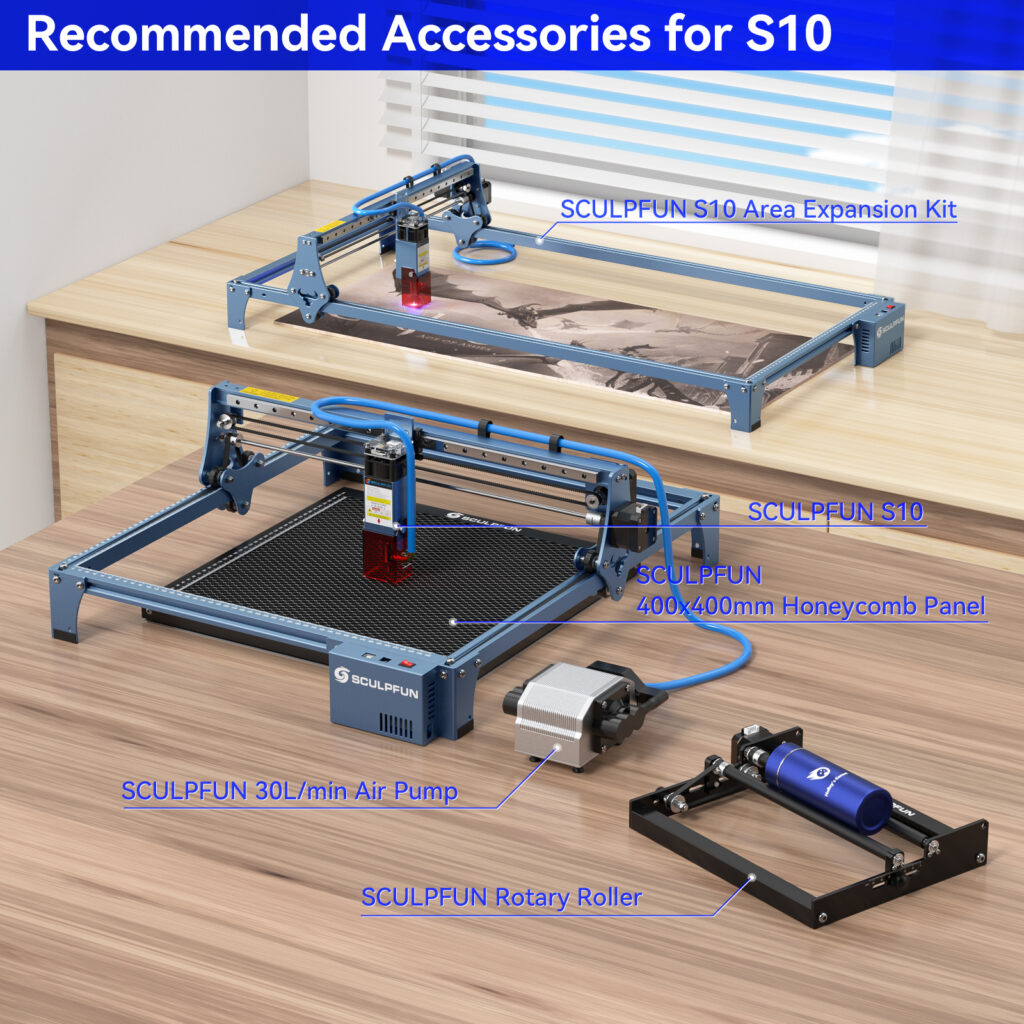
Official pictures
Here are a few of the official promotional images showing the features and scope of delivery. A frequently asked question is whether the Air Assist pump is also included, this is not the case. However, the Air Assist nozzle is including a hose. Except for the linear guidance of the x-axis, the structure has remained mechanically largely the same as the S9.


Technical data
A short summary (further data can also be found in the advertising images):
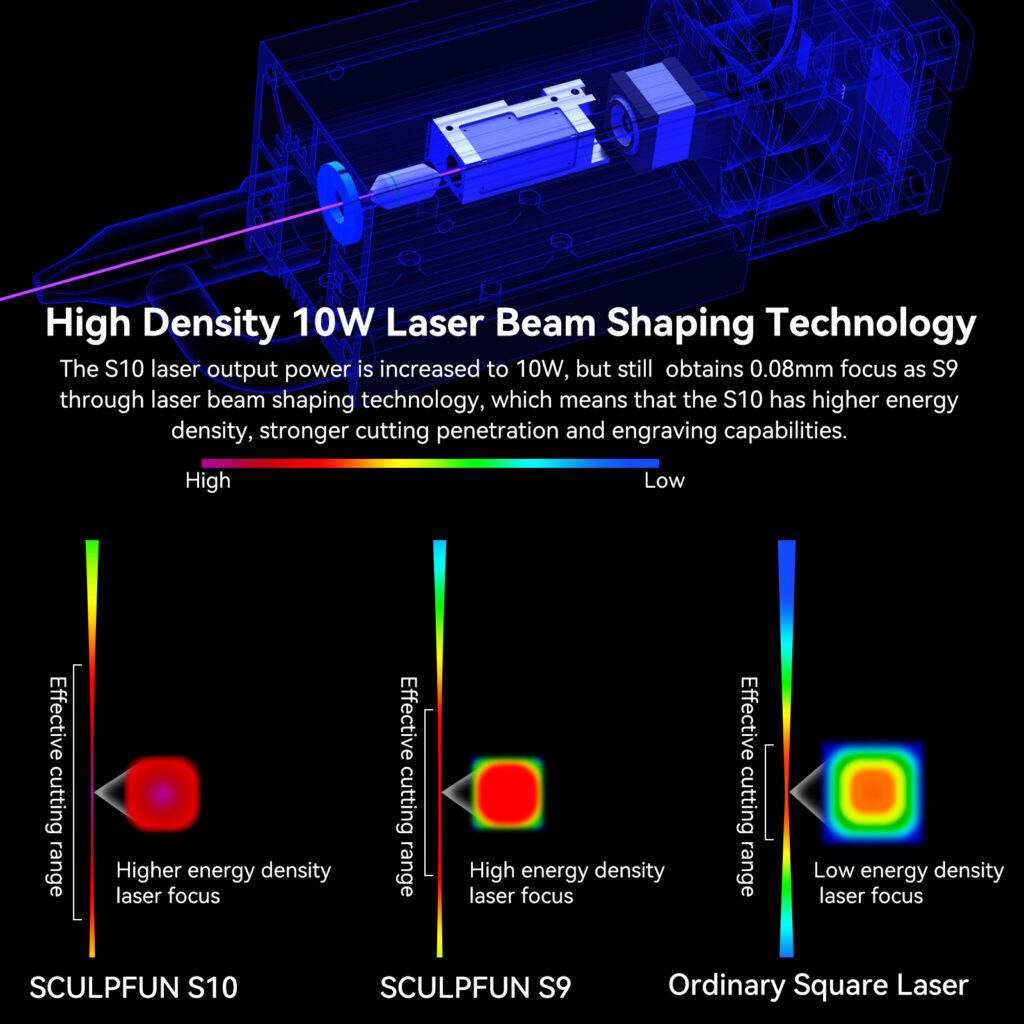
- Diode laser output power: 10 W (Note: This is the optical energy, not electrical energy)
- Inner diameter of the air nozzle: 7.5 mm (recommended: 30 L/min, 0.03 Mpa air compressor, outer diameter of the nozzle: 8 mm); Outlet at the tip: ~1.7 mm
- Laser wavelength: 455±5 nm
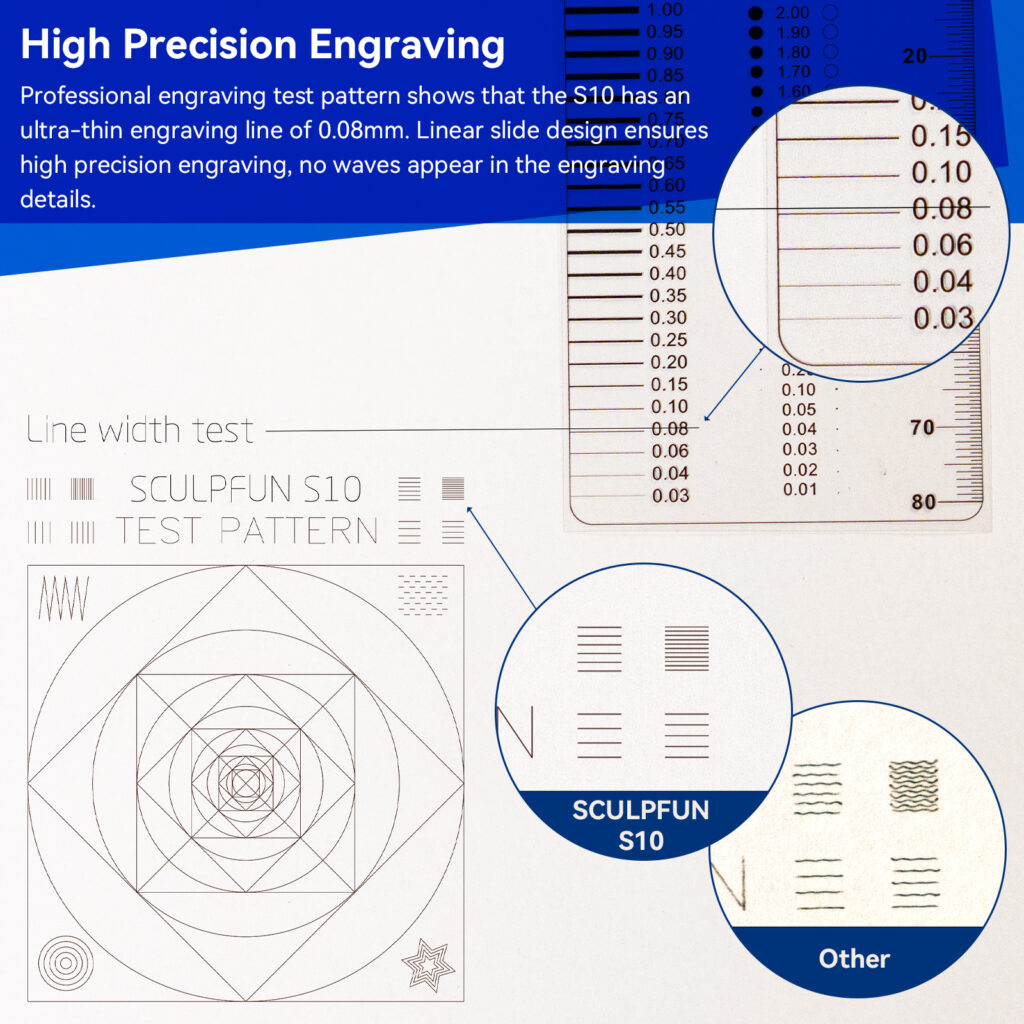
- Engraving accuracy: 0.01 mm
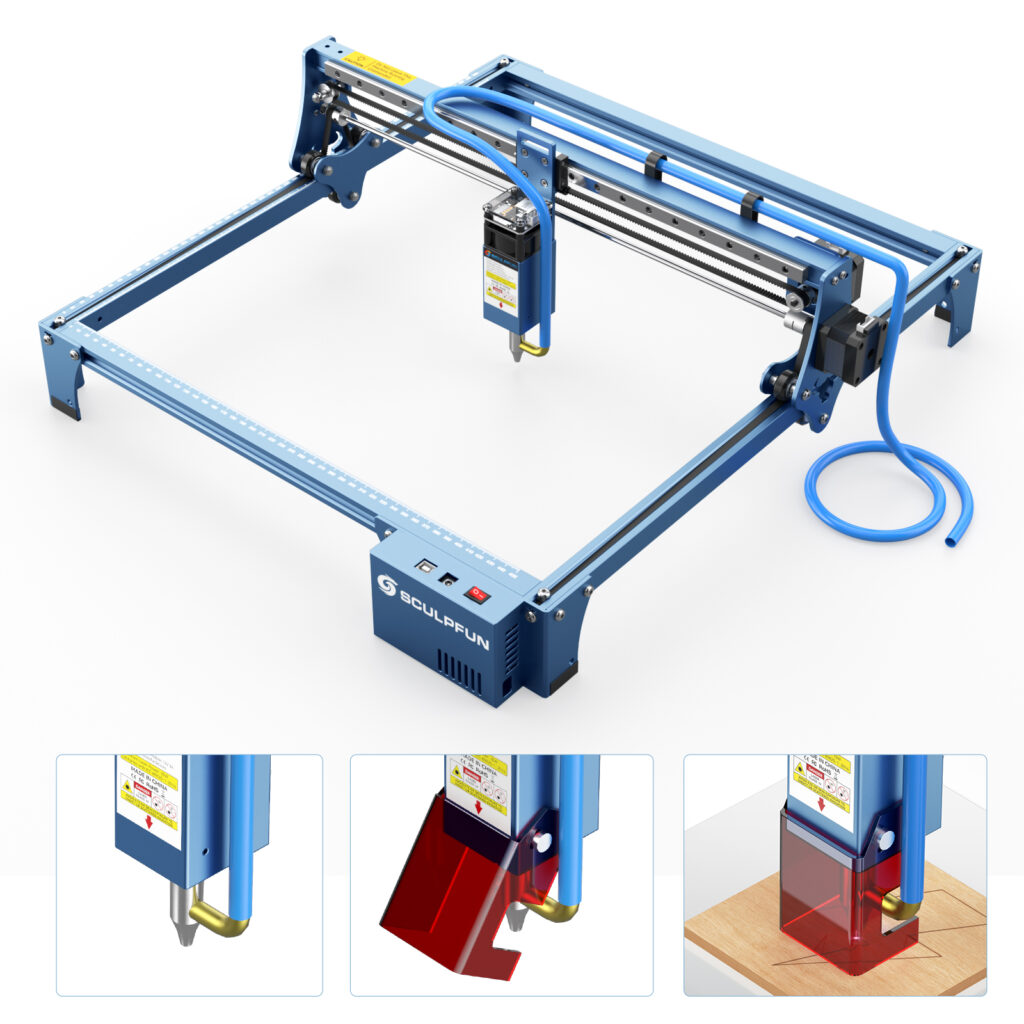
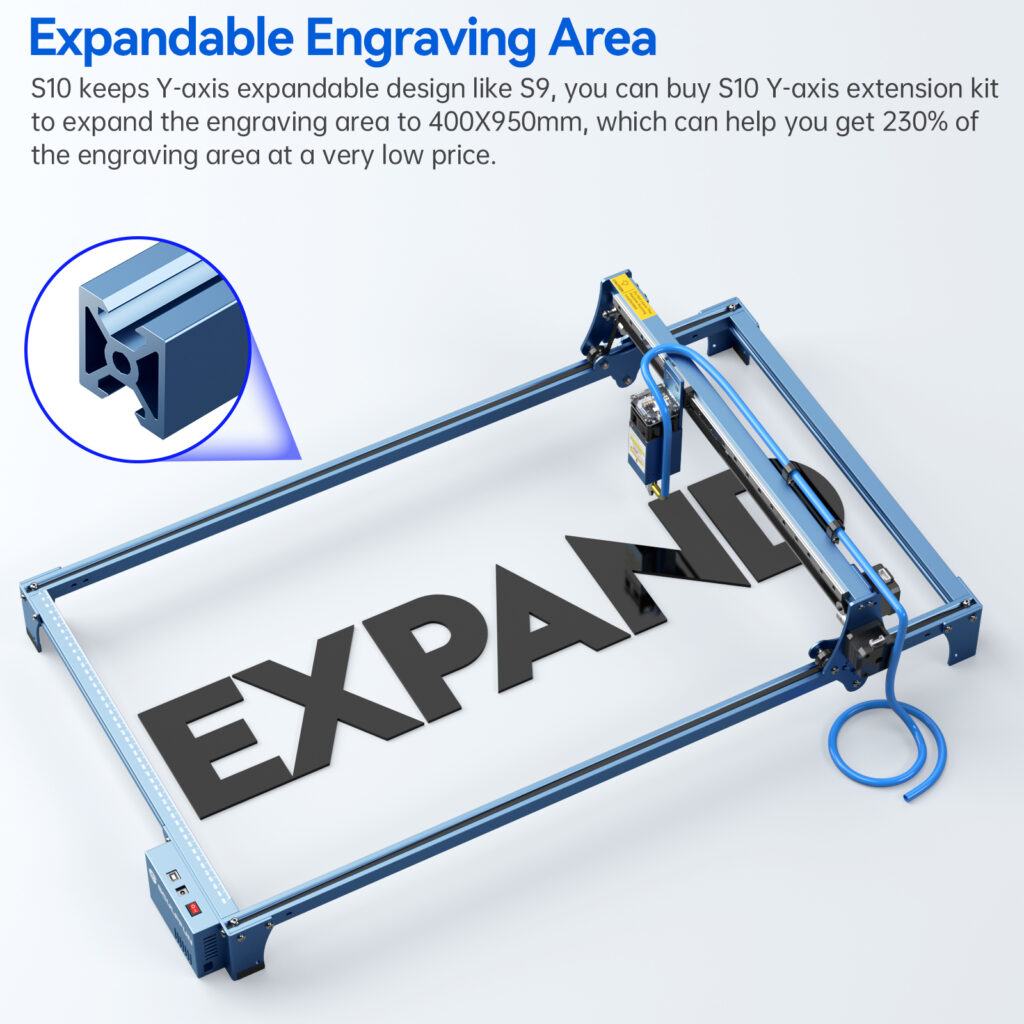
- Size of engraving area: 410 × 400 mm
- Focusing Method: Fixed Focus + Sliding Device
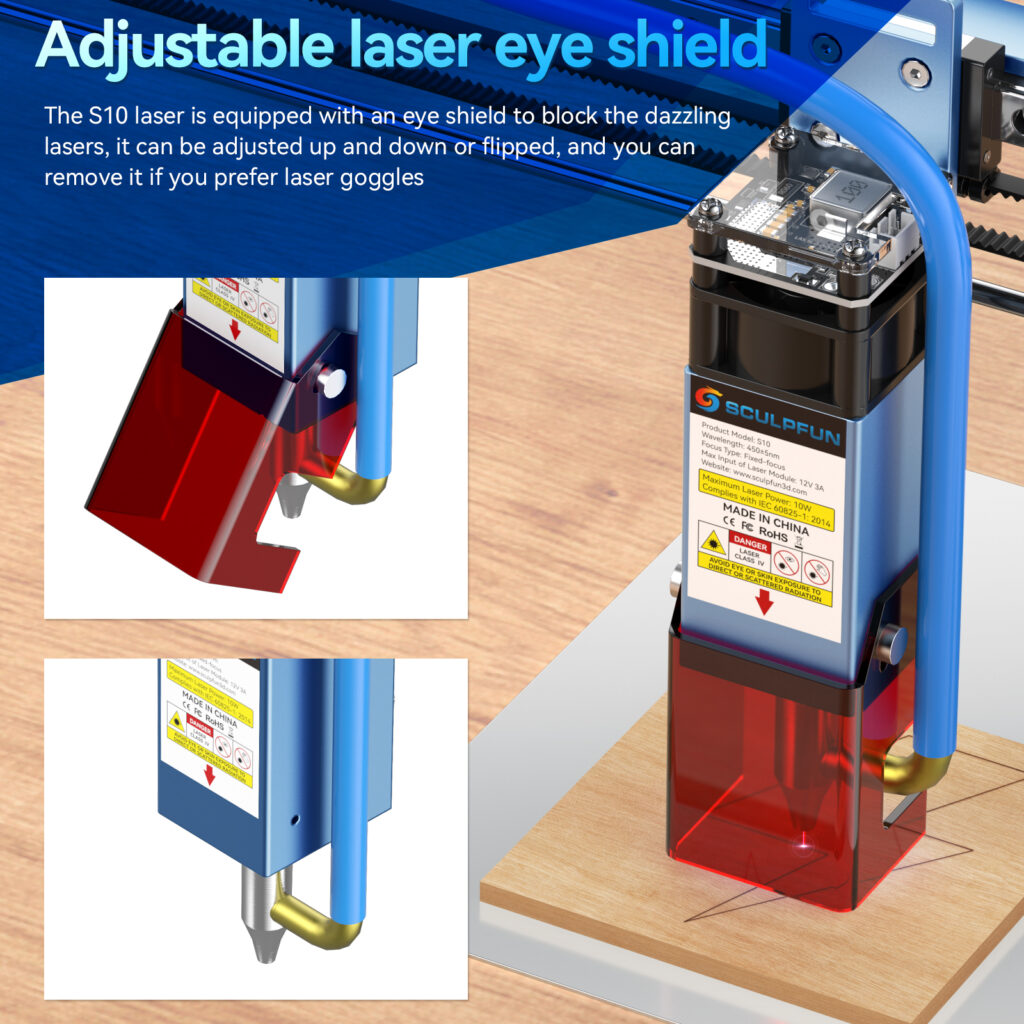
- Laser Protective Cover: Equipped with a detachable laser cover to protect the eyes.
- Power consumption of the machine: about 36W (not in terms of engraving or cutting power, power consumption only)
- Power supply: 12V, 5A (identical to S9)


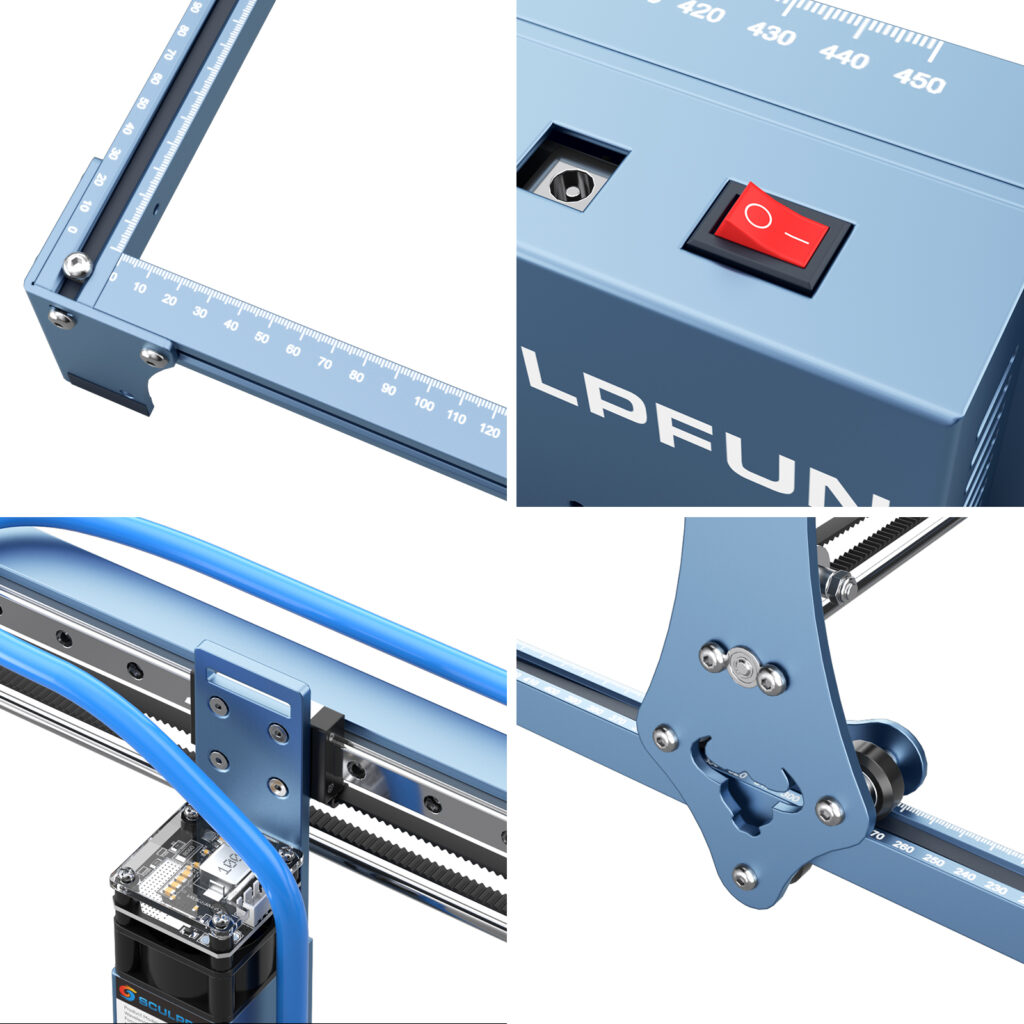
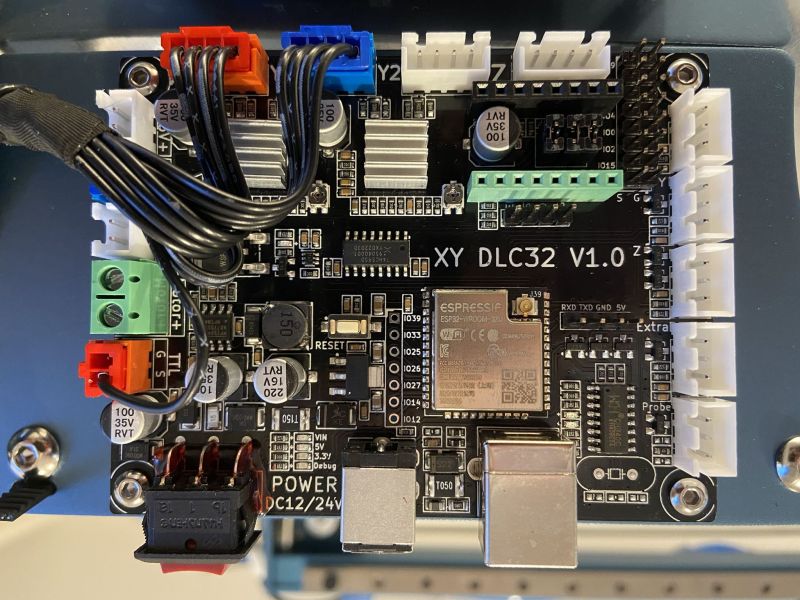
Motherboard
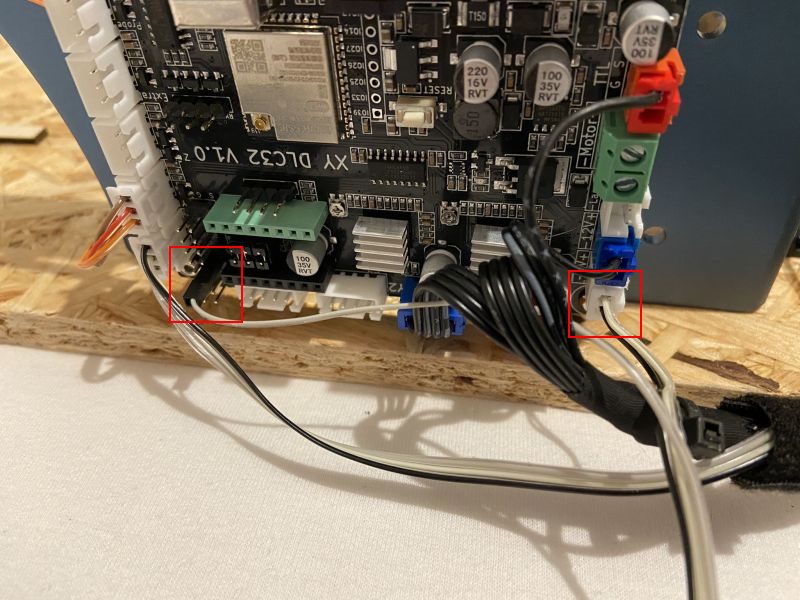
The motherboard has been changed from the S6/S9 models, it is now controlled by an ESP32 chip. Especially for tinkerers to note: the ESP chips work with 3.3V voltage. When connecting 5V hardware, you should pay close attention! The board also provides 5V where needed. The layout has been largely retained, which makes it straightforward to retrofit it with old lasers. At first glance, it makes a better impression than the MKS DLC32 design.
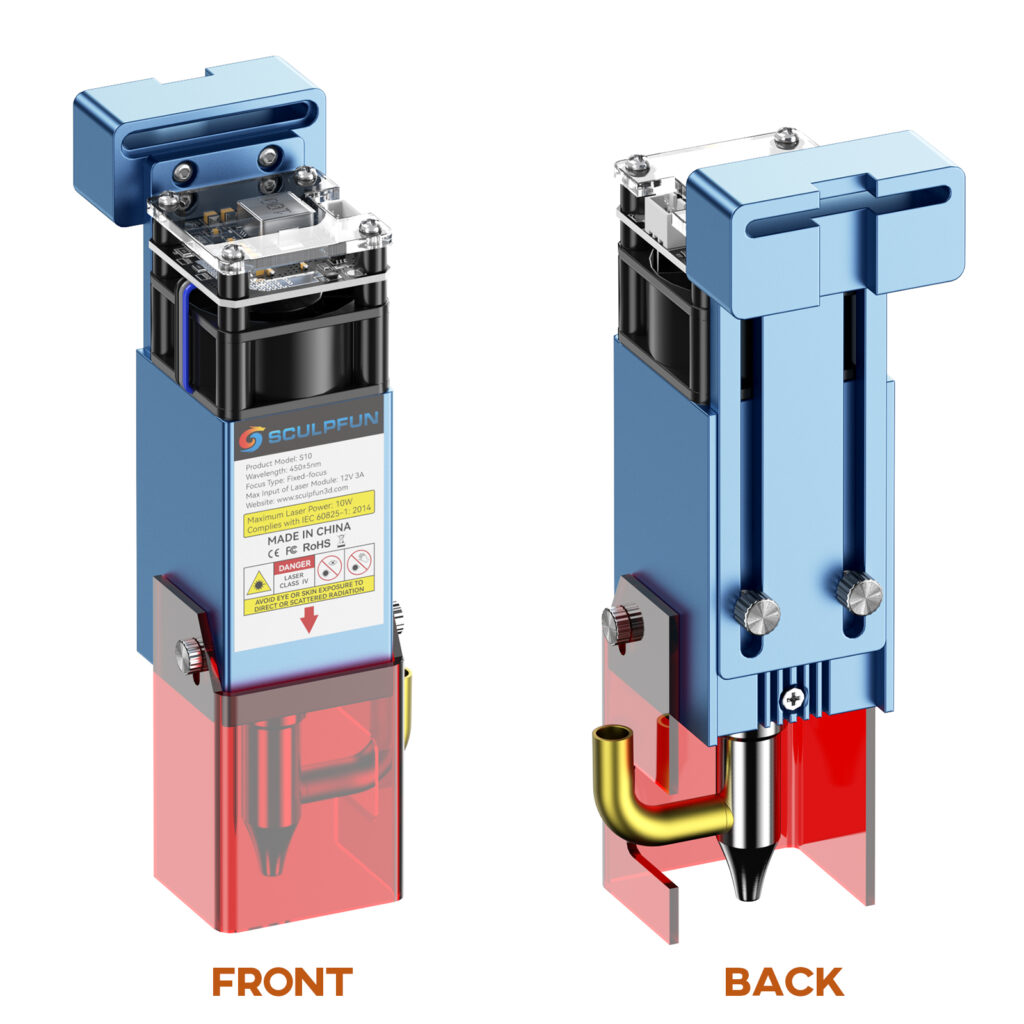
Air Assist nozzle
The Air Assist nozzle is designed to be screwed onto the laser. Finally, it is fixed in place with a grub screw. Therefore, it cannot be used on the other lasers. By screwing, however, you also have no problems with the alignment of the nozzle, which should always be perfect.


Setting up
As expected, the set-up is super easy. The instructions are top and also the small tricks in the setting of the mechanics (see setting and maintenance of the mechanics) are described. Nevertheless, I recommend going through the mentioned page and checking the mechanics carefully. It is not possible to adjust everything perfectly at factory production!
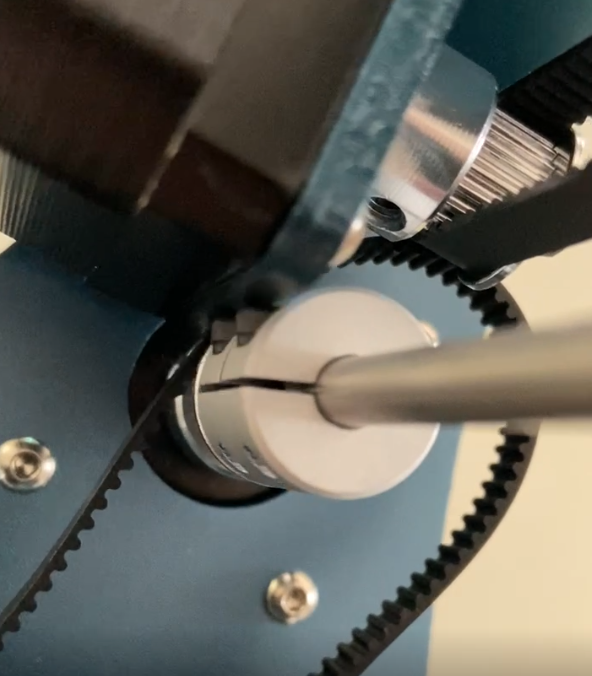
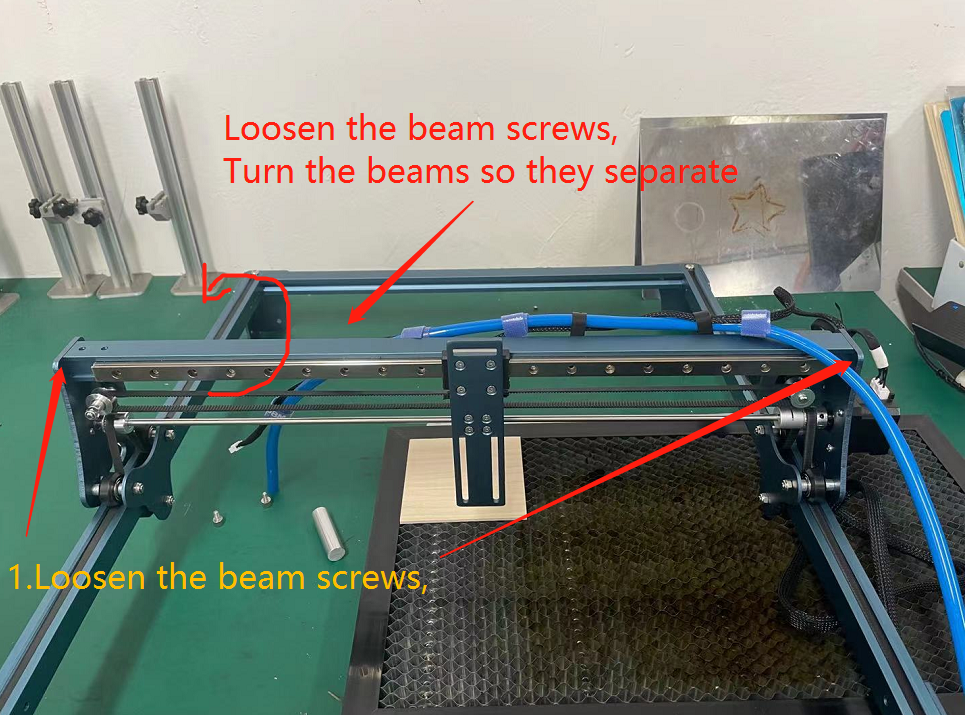
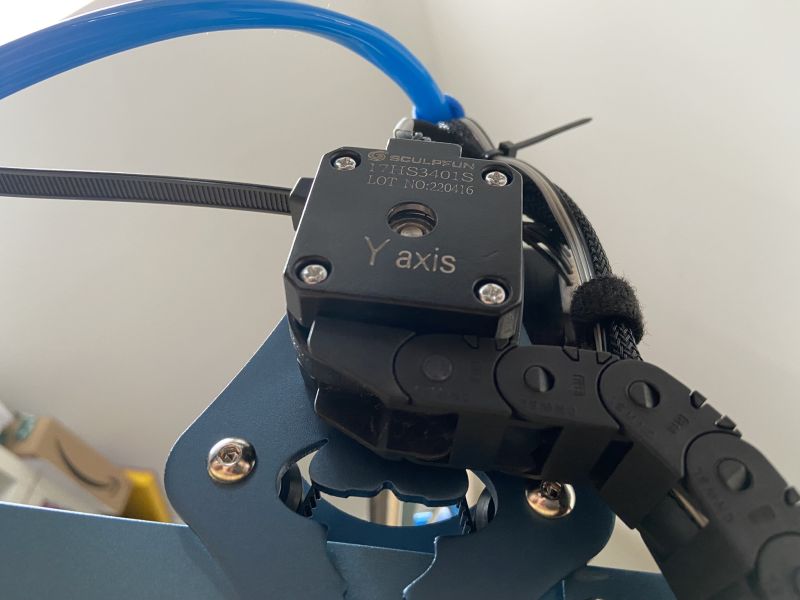
For me, the frame of the x-axis had shifted a bit due to the transport, so the long y-drive rod could no longer be rotated. If this is also the case for you, you can correct the alignment by loosening the screws on the upper profile:
Addons
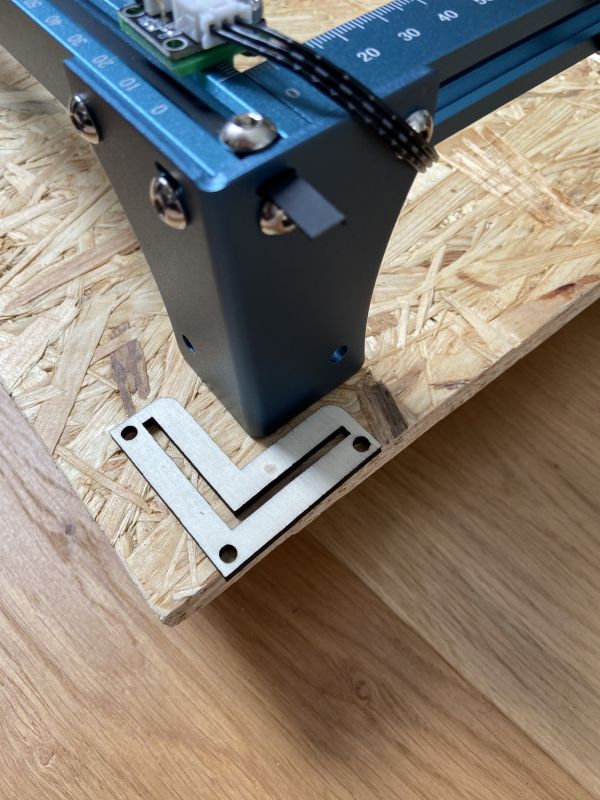
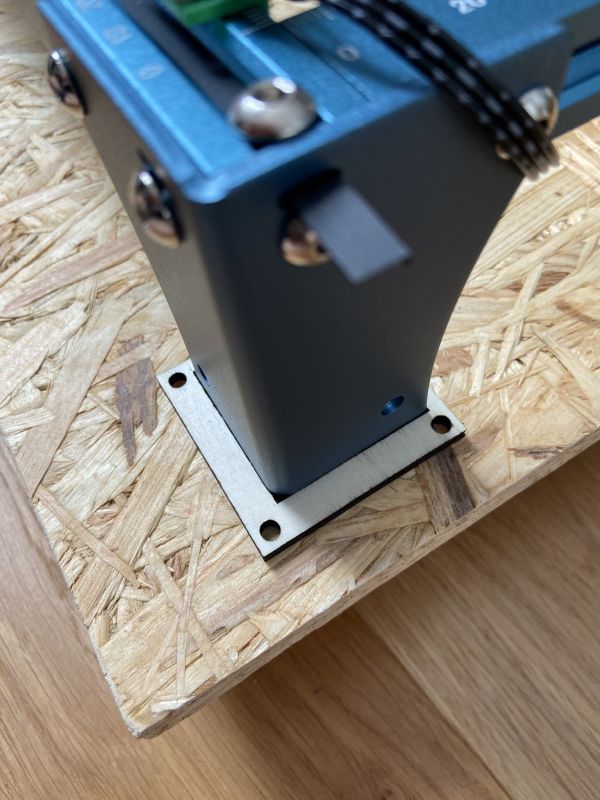
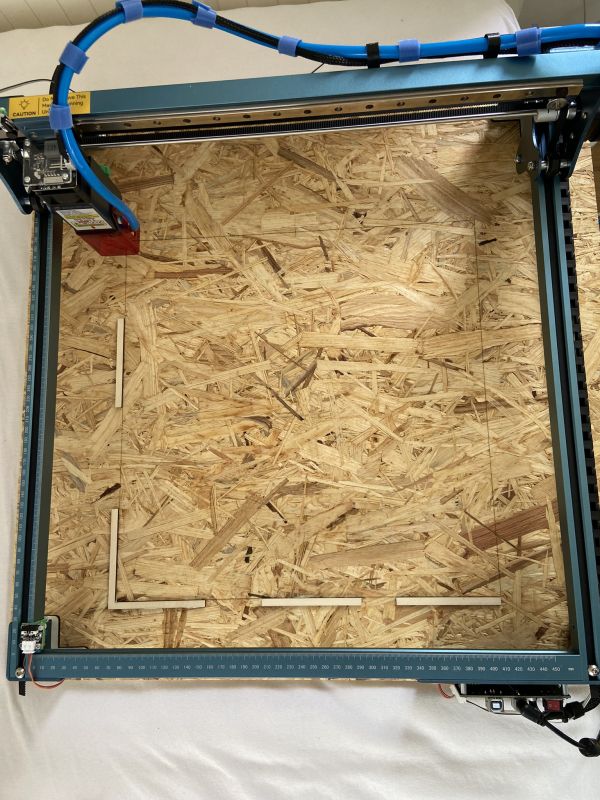
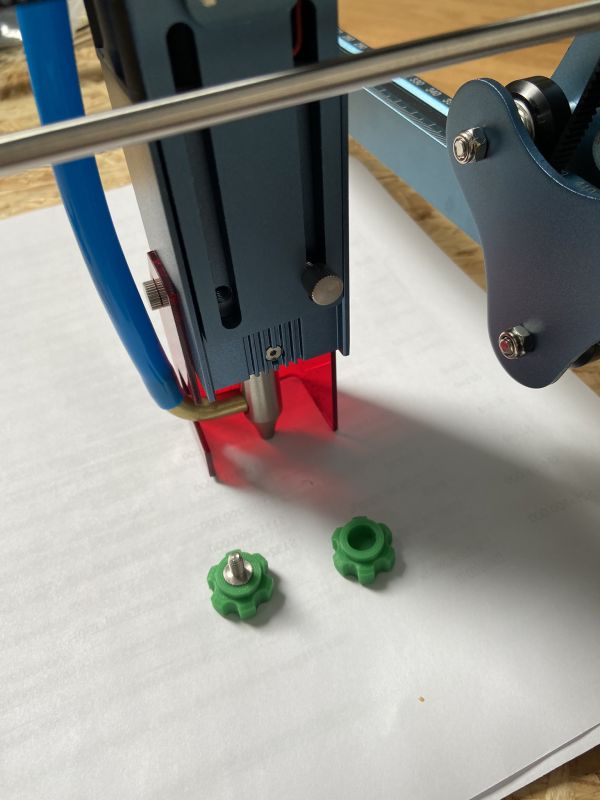
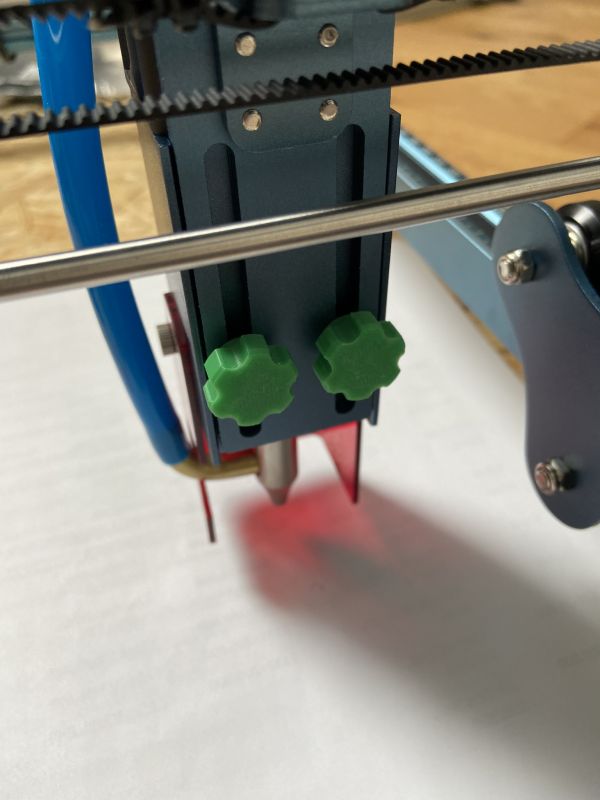
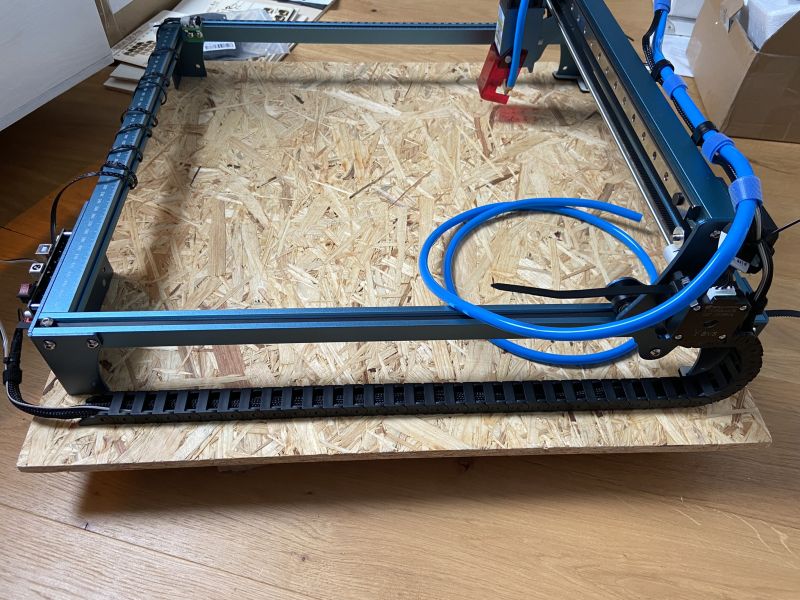
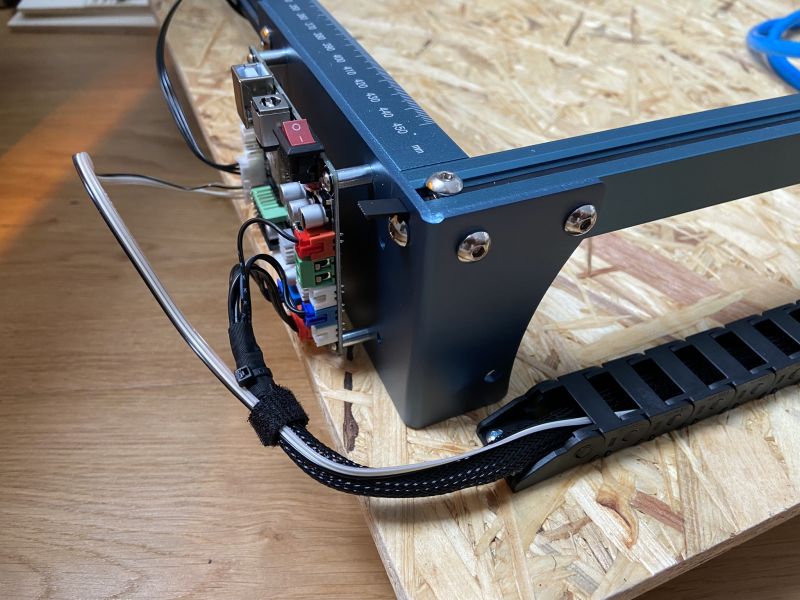
I mounted the laser on a wooden plate and secured it with small holders before slipping (a wooden panel should not be used for safety reasons! For me, this construction is temporary and gets a metal plate as a support, so that the risk of fire is reduced!). The holders can be easily created yourself with the laser. Download here. [New: I was asked to provide an STL version as well, here it is: Link]. Afterwards, I lasered the work surface of the laser and attached small brackets to which I can attach workpieces. Another very nice feature are these printed heads for the small screws that make height adjustment very easy: Thingiverse
In addition, I attached a drag chain, as I still had it at hand. This helps against cable clutter. I prefer those that can be opened on the outside. The size is 10 × 15 mm, which is quite sufficient, but not if the air hose is still to be carried out.
Flexible focus gauge
Daren designed a flexible focus gauge that can be mounted to the laser head when removing the safety shield. Be aware: only remove the shield if you have other safety measures (enclosure, glasses) in place! Here you can download all files for 3D-printing: Download


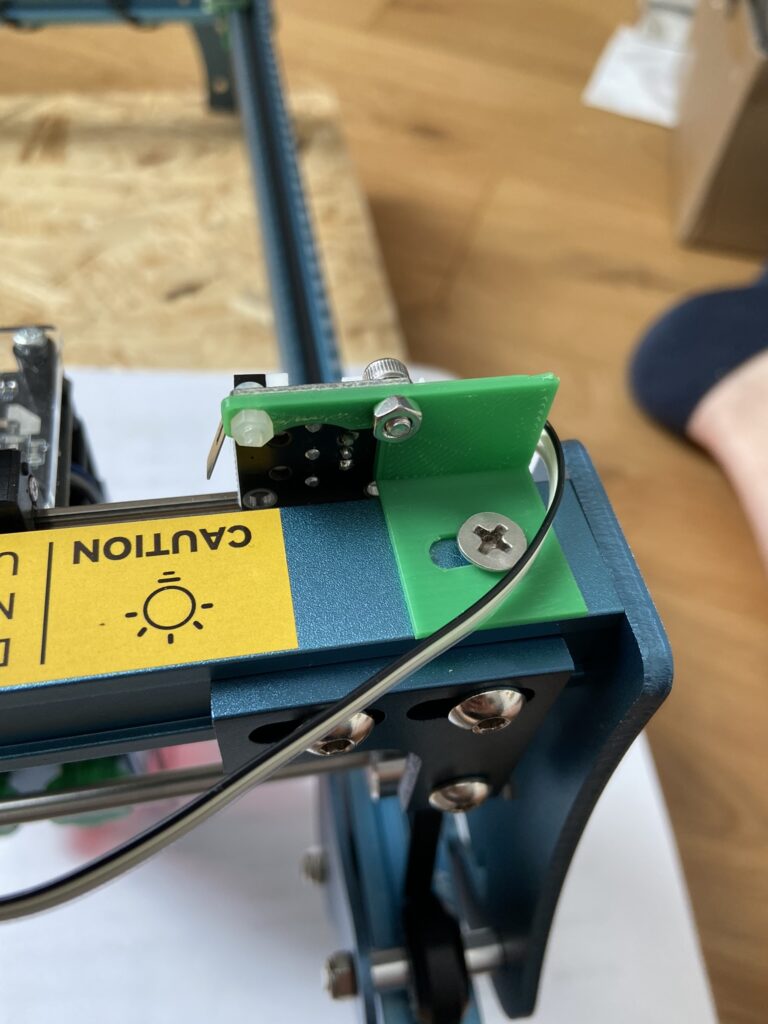
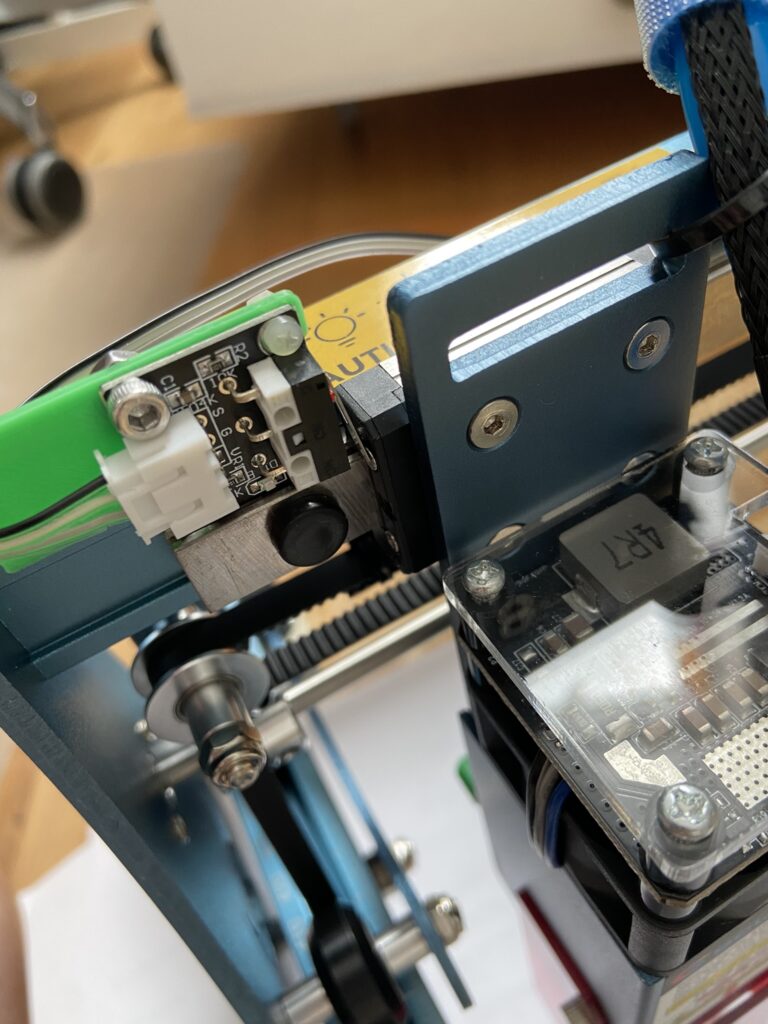
Adding limit switches
Since I have become very accustomed to working with limit switches and reference runs, I had to retrofit them directly here. This works without further problems analogous to the S6/S9 (see also article about limit switches). For assembly, I printed small brackets (which are not particularly optimized, someone can certainly do that even better): https://www.thingiverse.com/thing:5392586. It should also be noted that the switches slightly reduce the work area, but it has not quite reached the advertised size before. A size of 385 × 390 mm is realistic with limit switches.

Connecting a relay
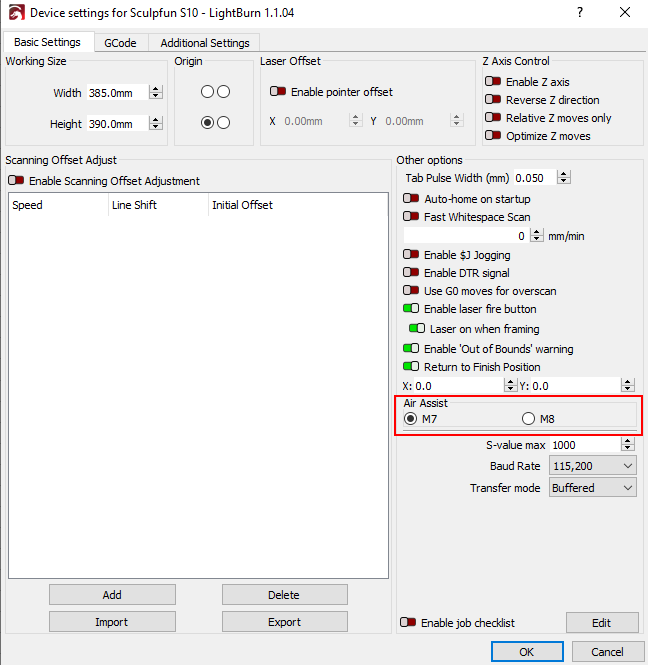
I have also become very accustomed to the fact that I do not have to switch on the pump manually, but have lasers do it themselves (see article on connecting a relay). This is also possible with the S10, but here with a small change to the S6/S9 (at least with the current version of the firmware).
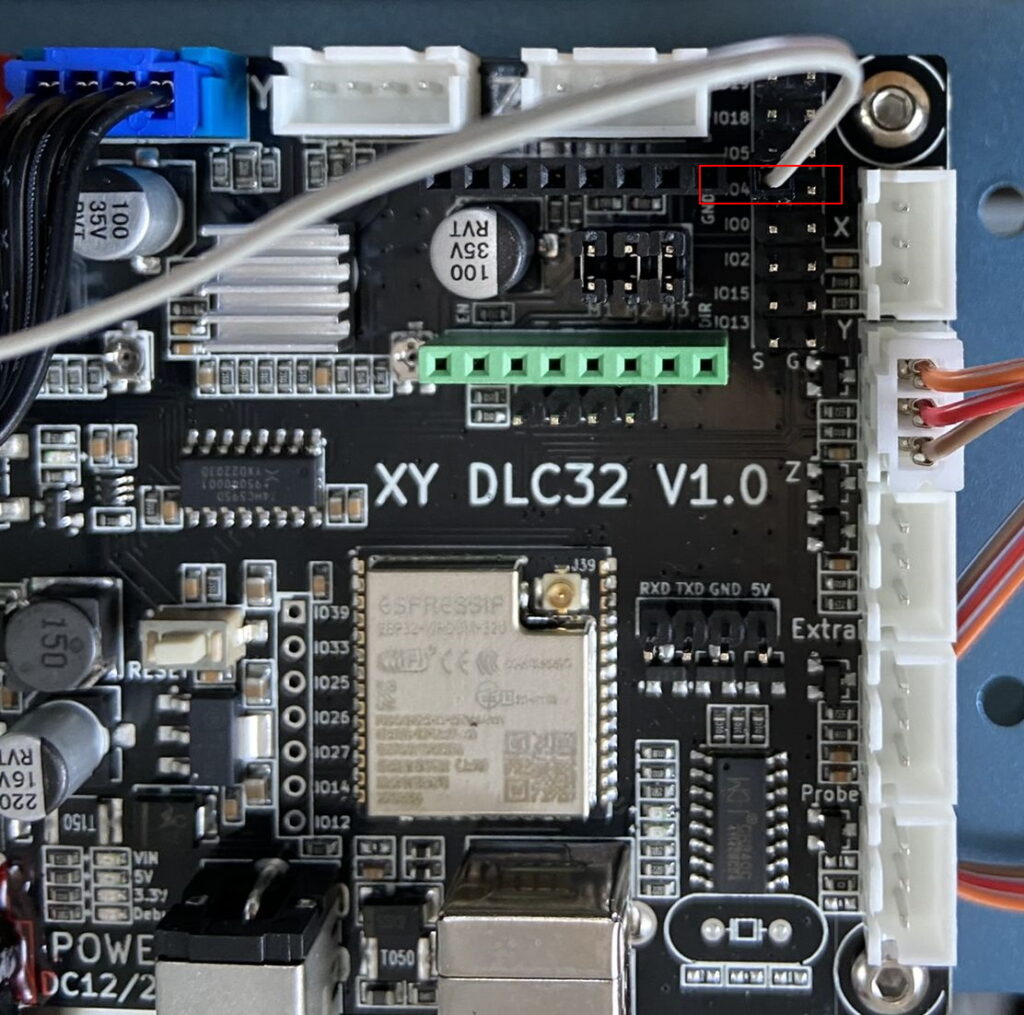
To control the relay, you have to use the command M7, not as usual M8 (I think with further firmware versions this will also be improved / changed). It is also important that it is a high-level trigger relay, as you can not invert the pin here. For example: AliExpress link
Add-ons by Patrick
Patrick created a set of add-ons and provided the complete STL package: download package.


Using the S30-Ultra-Upgrade Kits with an S10
The Ultra upgrade kits are officially not compatible with the S10 laser. If you don’t mind doing some extra work, it can work nicely on the S10 as well. This video shows the main missing part, the holder plate that makes the wider ultra modules fit to the thinner S10 mount. If you don’t have a 3D printer, you can also try my adapter for the bigger modules on the S10 (download, description).
More reviews and videos
Here I will collect the first tests and attempts from the other colleagues, so that you can get a good impression of the performance. Many of them can be found in the official Sculpfun User Group on Facebook. If a video is not done in English, you can turn on subtitles.
My reviews
Here are some quick-and-dirty tests that I did by myself to test the laser. It’s not very structured yet, but provides a first impression.


Further reviews
Review of Dragoncut
Review by hobbylasercutters.com
Here is the link to the full review.
Review from The Wrench
Review from KellyBlogs
Tests by Stephan (plottmania.de)
Review of TJ Bell
Cutting 20mm premium pine wood: https://www.facebook.com/100003711190929/videos/689714148996056/